First deploy
In the previous section, we created the firebase project. Now we need to edit the config files and deploy our code!
Dependencies
The project uses node with the yarn package manager (npm may also work). The jq command line utility is used extensively in the shell scripts.
Checking out the repo.
To check out the git repository, from your terminal run:
git clone https://github.com/neumark/tw5-firebase.gitInstalling nodejs dependencies
If you have nvm installed, it's a good idea to set the node version by running nvm install.
Install the required node packages with yarn:
cd tw5-firebase
yarn install
Getting a firebase admin token
Firebase provides a CLI tool which can be used to generate a token required to interact with your firebase project. Run:
yarn run firebase login:ciA Google account chooser and permission dialog will be displayed in your browser. Once you have agreed to provide the firebase CLI with the necessary privileges, you should see a token displayed in your terminal.
yarn run v1.22.5
$ tw5-firebase/node_modules/.bin/firebase login:ci

Visit this URL on this device to log in:
https://accounts.google.com/o/oauth2/auth?client_id=563584...24&redirect_uri=http%3A%2F%2Flocalhost%3A9005

Waiting for authentication...

✔  Success! Use this token to login on a CI server:

1//09Oo29t7x9kNkCgYIARAAGAkSNwF-L9Irvff76VolUzmloznZQAfsJQRoG-OnjS-3rsQi_720U-snphSBq5hn8oIogkK6fBlHYQ

Example: firebase deploy --token "$FIREBASE_TOKEN"

✨  Done in 13.66s.
Creating keys.json
Copy the file etc/keys.json.example to etc/keys.json, adding your own firebase token in the firebaseToken field, eg:
{
    "firebaseToken": "1//09Oo29t7x9kNkCgYIARAAGAkSNwF-L9Irvff76VolUzmloznZQAfsJQRoG-OnjS-3rsQi_720U-snphSBq5hn8oIogkK6fBlHYQ"
}
This step is required for the scripts in the scripts directory to work (they all authenticate using the firebase token in keys.json). It's OK if there are additional fields in keys.json which are still just placeholders.
Creating config.json
Non-sensitive firebase-specific configuration is stored in etc/config.json. Copy etc/config.json.example to etc/config.json. Next, we'll copy the firebase app config from the admin UI.
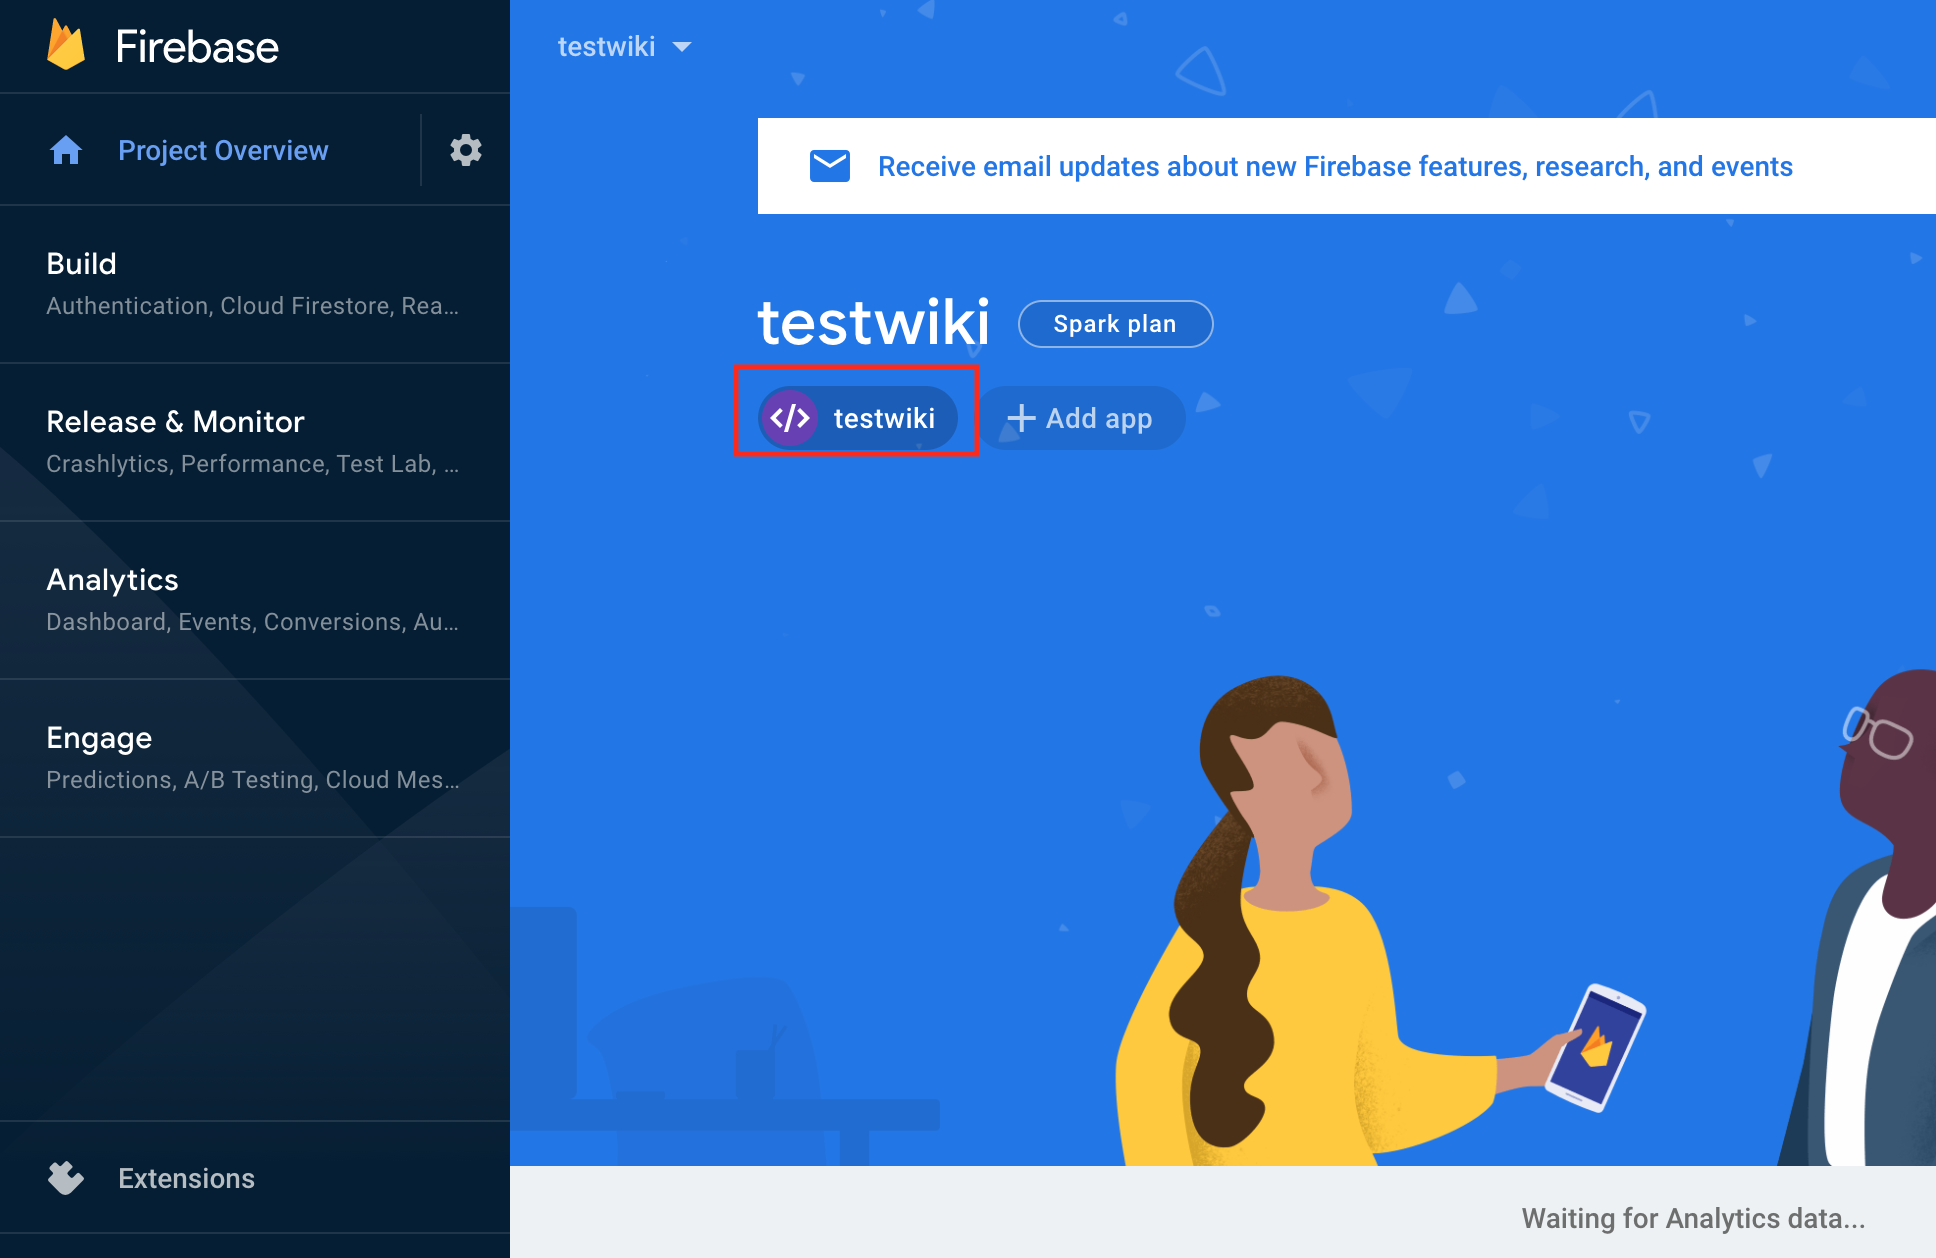
In the firebase admin, select the testwiki app within the project by clicking on </> testwiki:
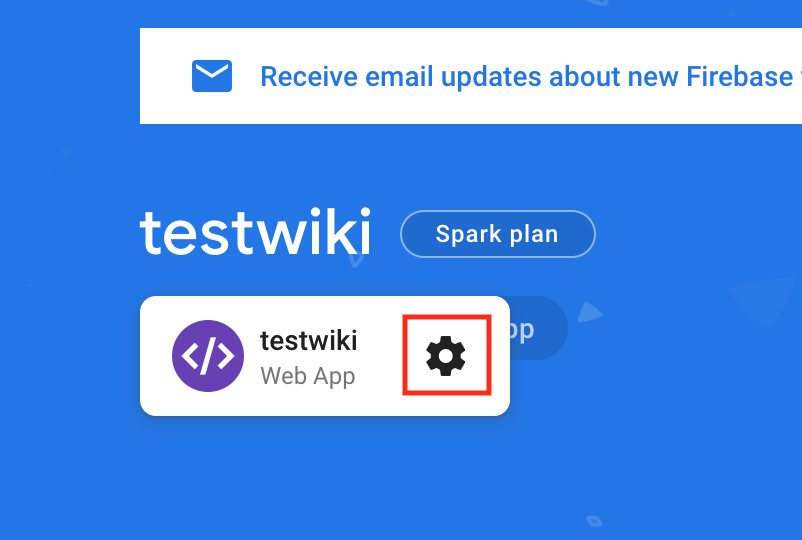
When a small popup is displayed, click on the cog.
The Settings page for the app will appear. Scroll down and select Config from the radio options:
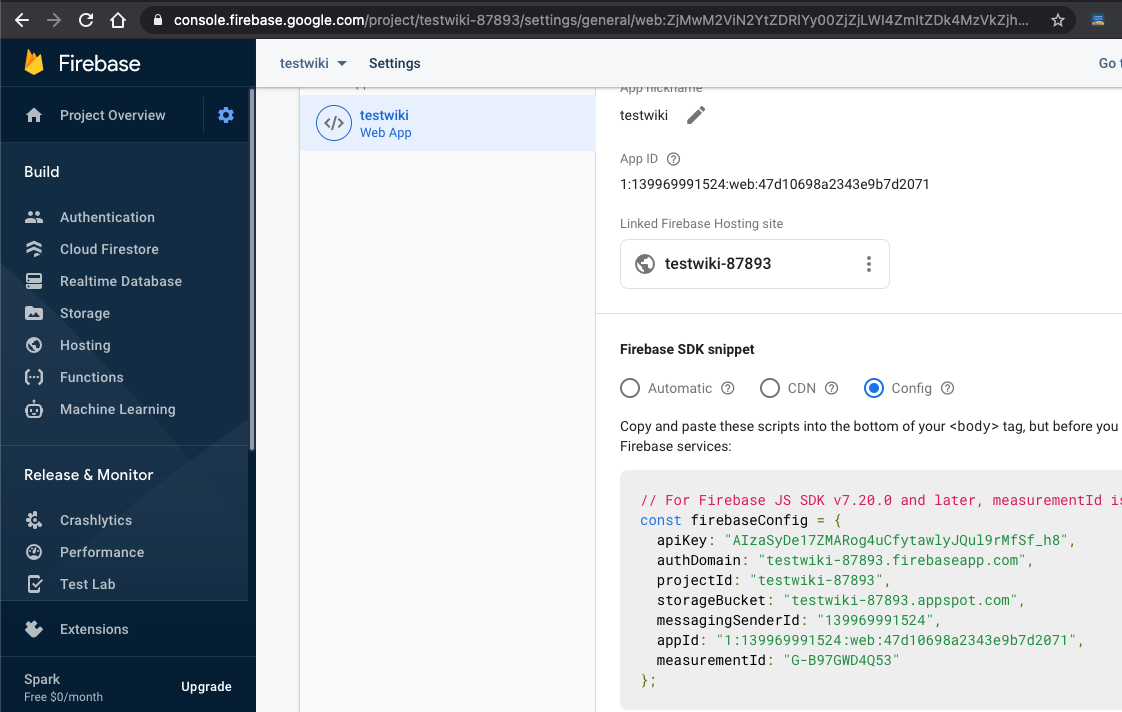
Copy the fields in firebaseConfig into the firebaseConfig section of etc/config.json.
A single firebase project can host several tiddlywiki instances. Let's name our first wiki testwiki just like the firebase project and app. Update the wikiName field in the wiki section of etc/config.json.
Downloading the service account key
Go to project settings (click on the cog next to Project Overview), and select the Service Accounts tab. Click on Generate new private key. In the confirmation dialog, click Generate key.
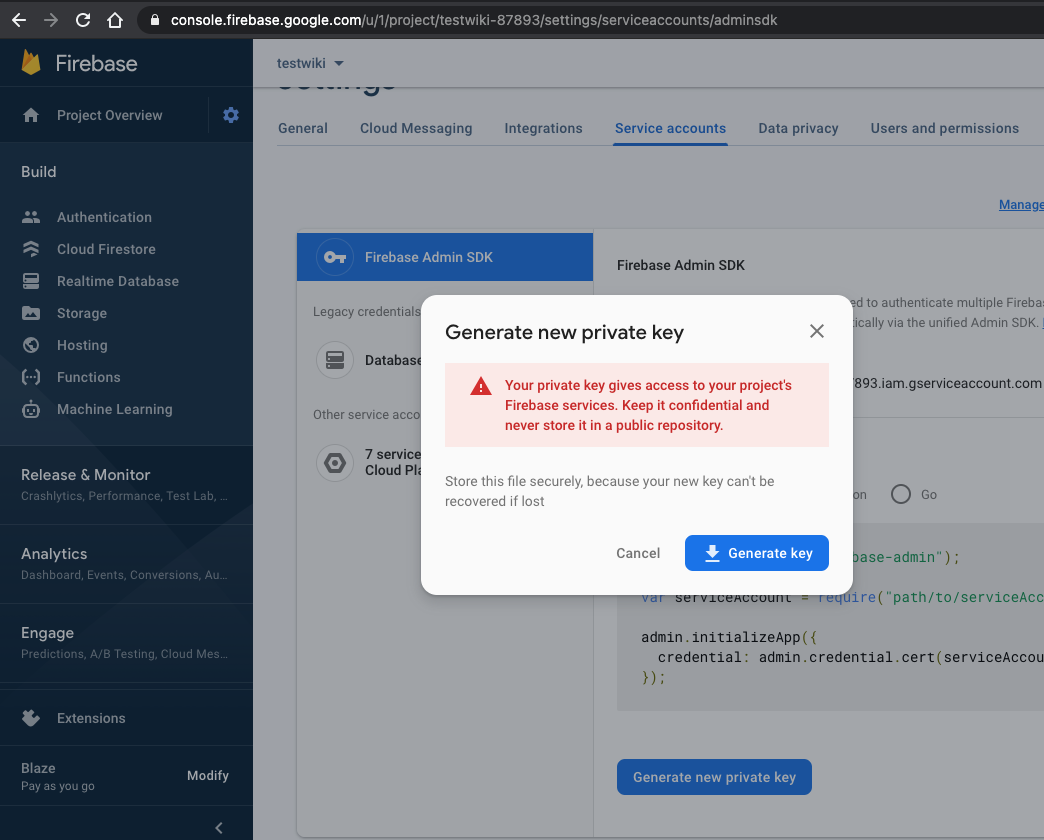
Your browser will download a json file. Move this file to etc/service-account-key.json.
Running the deploy script
yarn run deployThe output should look something like this:
=== Deploying to 'testwiki-87893'...

i  deploying storage, firestore, functions, hosting
i  firebase.storage: checking etc/storage.rules.json for compilation errors...
✔  firebase.storage: rules file etc/storage.rules.json compiled successfully
i  cloud.firestore: checking etc/firestore.rules.json for compilation errors...
✔  cloud.firestore: rules file etc/firestore.rules.json compiled successfully
i  functions: ensuring required API cloudfunctions.googleapis.com is enabled...
i  functions: ensuring required API cloudbuild.googleapis.com is enabled...
✔  functions: required API cloudbuild.googleapis.com is enabled
✔  functions: required API cloudfunctions.googleapis.com is enabled
i  storage: uploading rules etc/storage.rules.json...
i  firestore: uploading rules etc/firestore.rules.json...
i  functions: preparing functions directory for uploading...
i  functions: packaged functions (99.94 KB) for uploading
✔  functions: functions folder uploaded successfully
i  hosting[testwiki-87893]: beginning deploy...
i  hosting[testwiki-87893]: found 20 files in public
✔  hosting[testwiki-87893]: file upload complete
✔  storage: released rules etc/storage.rules.json to firebase.storage
✔  firestore: released rules etc/firestore.rules.json to cloud.firestore
i  functions: uploading functions in project: wiki-app(europe-west3)
i  functions: creating Node.js 12 function wiki-app(europe-west3)...
✔  functions[wiki-app(europe-west3)]: Successful create operation.
Function URL (wiki-app): https://europe-west3-testwiki-87893.cloudfunctions.net/wiki-app
i  hosting[testwiki-87893]: finalizing version...
✔  hosting[testwiki-87893]: version finalized
i  hosting[testwiki-87893]: releasing new version...
✔  hosting[testwiki-87893]: release complete

✔  Deploy complete!

Project Console: https://console.firebase.google.com/project/testwiki-87893/overview
Hosting URL: https://testwiki-87893.web.app
The line starting with Function URL (wiki-app): contains the API endpoint URL. Update the value of wiki.apiEndpoint in etc/config.json with this URL, adding a trailing /. Once the apiEndpoint value is updated, a second deploy is required:
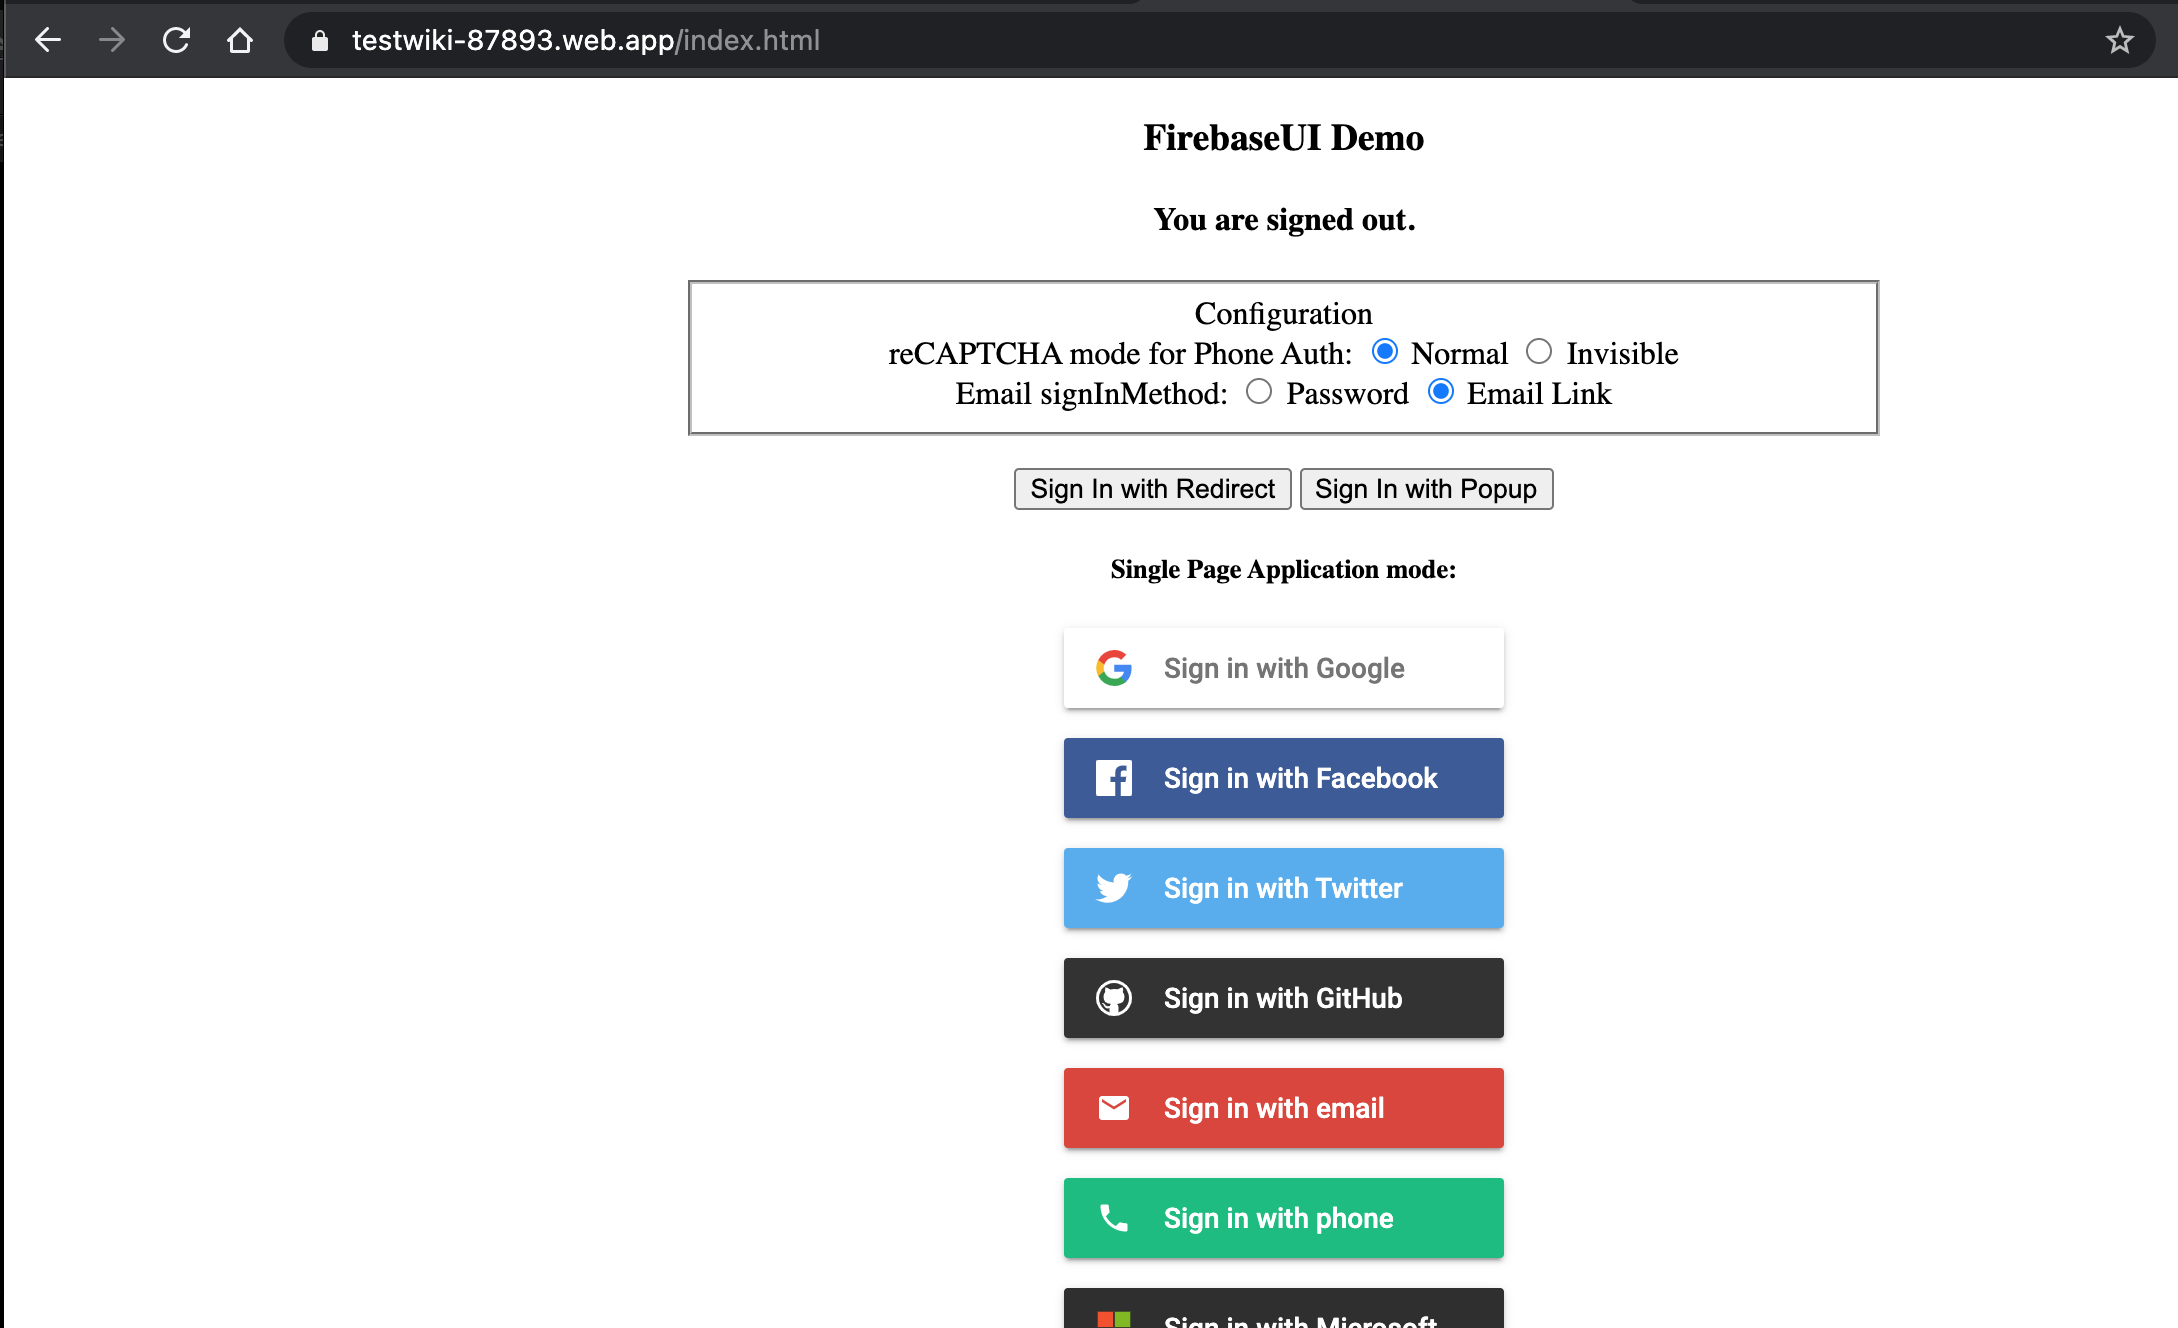
yarn run deployThe Hosting URL: is where the wiki is available: https://testwiki-87893.web.app
At this point, you should be able to see a login screen when visiting your hosting URL.
Next step: Authentication and wiki permissions